I personally use Jet Brain's IntelliJ IDEA (Community Edition 2018.1 at the time I write this) to develop my Jython projects. It can be used to help develop Jython itself. I will include screen-shots, and, hopefully you can set it up successfully. you may obtain the Community Editions from www.jetbrains.com. They are free.
I currently use Ubuntu 16.04 as my OS, but this should work in Windows as well.
Prerequisites:
You need to have Pycharm installed on your system as well, to take advantage of the Python plugin available for IntelliJ. install Pycharm first, and configure your Python interpreters. intelliJ will search for these when setting up the projects.
If you don't have Python installed, on Linux, you can download and install Python 2.X and 3.Z using the apt-get commands:
sudo apt-get install python (for Python 2) and
sudo apt-get install python3 (for Python 3.X)
Once you install Python and set up up Pycharm to use the Python interpreters, then you may install IntelliJ.
If you are cloning projects from GitHub or Mercurial, you need to have them installed on your system.
Set up IntelliJ to use Python/Jython:
When you've installed IntelliJ, the first window is where you select your project, At the bottom right, click Configure, then select Plugins. You will need to add the plugin for Pycharm.

Look for the Pycharm Community Edition plugin. If you don't have it, you need to download and install. Click "Install JetBrains plugin".
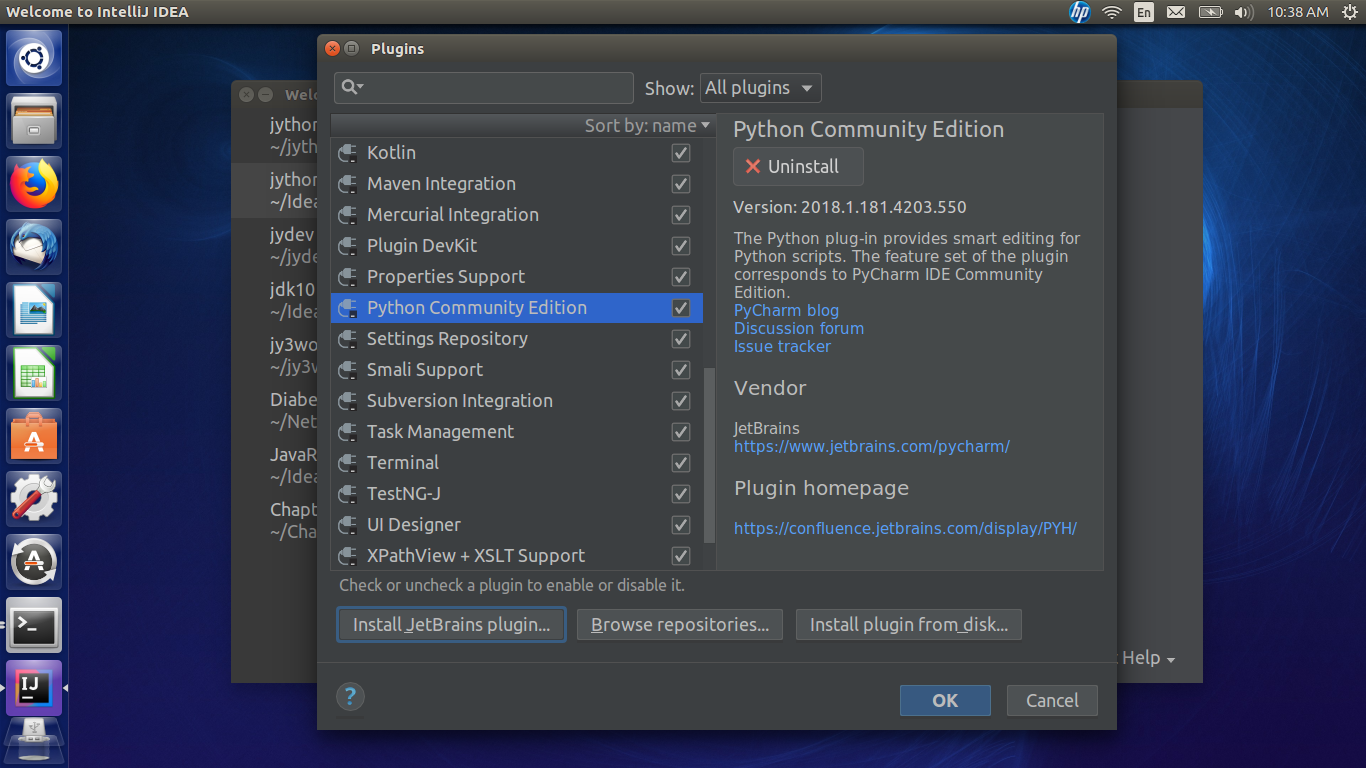
In the search dialog, type a partial name. Then select Pycharm Community Edition. On the right, there will be a green Install button. Click and follow the prompts. You may need to restart the IDE.

When you restart IntelliJ, you are now ready to set up a Jython project. The following screen-shots are for setting up the Jython development project.
Select "Check out project" from the main window, then select Mercurial. (This post will be updated later, when they move the project to GitHub). The link is https://hg.python.org/jython. The default directory will be <root>/IdeaProjects/<projectname>. If you want to store the source files somewhere else, put the path here. Then click "Clone". When it finishes, it will ask you if you want to create a project. Agree.

The project defaults can be accepted except in two places: The first one is shown below. At this screen, there are two options on setting up the projec: file based, or directory based. Choosing directory based makes it easier to compile and build your project. more explanation will follow later on, when i discuss the building your project.

The second is the modules screen. You only need one, your main folder. In the screenshot below, my folder is jydev, and that's the only module I need. unselect all the other ones. It doesn't remove the directories. Again this makes compiling your proect a lot easier.

Once you've finished setting up your project, it will open and be ready. Now, whe will go through the project structure and tweak the settings.
From the File menu, select "Project Structure".
Under the Project menu item, select the Java JDK you will work with. While you can use any JDK, for Jython, it is strongly suggested to use JDK8 or below, pending integration with JDK9. For me, I picked JDK1.8. If there are no JDKs set up yet, then click "New", then find the JDK directory. Then click OK to return to the Project setting.

Next is the "Modules" setting. When it set up your project, IntelliJ automatically found your Python sources (as shown by the arrows). Click Python, then select your Jython interpreter. If there is no Jython interpreter set up, click the ellipses to the right of the drop-down. The SDK window will appear. Click the "plus" to add an SDK and find your Jython installation path. it will add it as a SDK. Once that's done, click OK to return to the Modules menu. For all Python code, select Jython as the interpreter.
NOTE: If you are working on Jython itself, you can choose the development Jython as your interpreter. Just add it at the SDK screen, change the name label. Use the release Jython for your other projects.

Under SDK, you can leave it set to the JDK you selected in the project menu.


The above steps are for setting up general Jython projects you want to develop The following screen-shots are specifically for Jython development itself.
note: If you would like to use the "Build project" from the menu, there are some steps to ensure a successful build. You will need to run Ant at least once, to generate the build folder. Follow the Ant setup section.
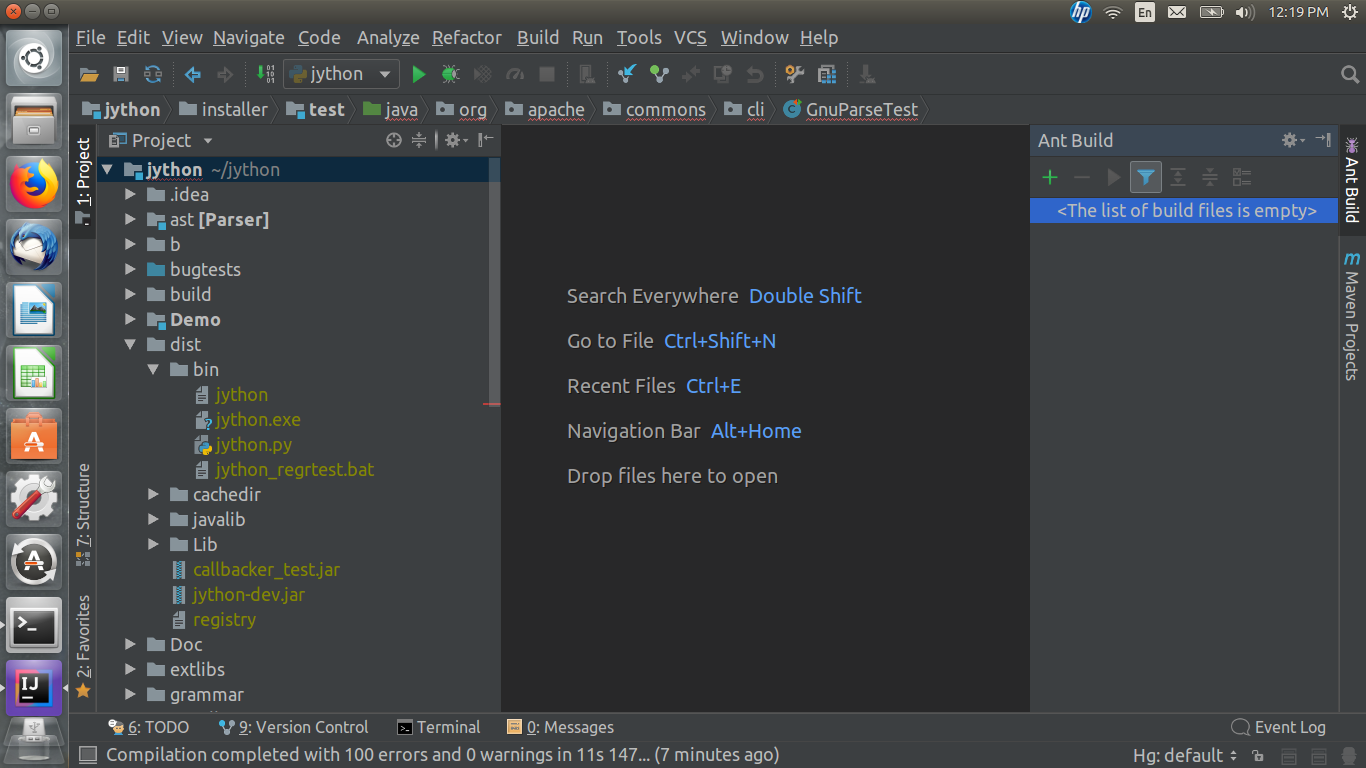
You may use IntelliJ's "Build project" option (from the Build menu. Or you can use Jython's own build.xml file and Ant to build your project. I have my IDE set to show the Toolbar, and also Tool Buttons (from the View menu). Tool Buttons will give you the buttons on the left, right and bottom of the window. on the right side, are the ant and Maven buttons. Click "Ant Build" to bring up the dialog. As you see, it doesn't show anything.

Now, it will show a list of Ant build options. if you click filter (the green icon to the right of "Run"), it will only show the Ant build selections contained in the build.xml file. We will use "developer-build". Right-click "deverloper-build" and select Properties.


Now that you've built Jython, you can now run it from within the IDE. You must choose the Python interpreter, as it runs under Python. In your /dist/bin folder (in the projecxt file tree), find the jython.py file. The first time, it will ask you to configure it.
Windows users: You should run the jython.exe file, instead of the jython.py file
This window will open. you can put any parameters you like (such as any JVM options, or switches). For a list of options, at the terminal, run Jython with the -h for help. In the environment section, select "Use specified interpreter" and select Python 2.7. Then check the box for "Emulate terminal in output console" (so that you will see the interactive prompts, >>> and ...). When you're finished, click OK. then select "Run" from the "Run" menu item.

There, you're all done. Note: Any Python files containing inline Java code, you should select Jython 2.7 as the interpreter (if it hasn't already). Only the jython.py file needs to run under Python.
The debugger will use the same interpreter as the Run configuration, so for jython.py it will use Python. All others will use the Jython debugger or the Java debugger (if it is a .java source file).
Building the Project
If you ran Ant and it returned an error, don't despair. The next section will help in setting up the source code and libraries to build and then you can run Ant again successfully.
You need to make sure that *all* of your sourcesfolders are chosen. IntelliJ is sort of strange in this regard. open your Porject Structure, go to your Modules. you will see all the subfolders under your jython folder. After you ran Ant, it created a /build folder. Navigate to the "gensrc" folder, expand and select all folders . Once they are highlighted, click Source. The folders will turn blue. Do the same for the src and all sub-folders.


Next, you need some external libraries. I had to add an Ant library, an informix library and an ojdb library. Click _ then select "Java", navigate to the folder containing the .jar file. Select the .jar file, then click OK. Click OK again to attach it to your jython module.
Once you coomplete these stepts, click OK and then run "Build porject" from the Build menu.

I hope this tutorial is clear and easy to follow. If you continue to have trouble and need more help, please contact me at psykiatris@gmail.com and I will be very glad to help you.
Happy coding!
No comments:
Post a Comment